Have you ever tried red velvet cake, only to be disappointed by a dry, dense texture? Our best red velvet cake is moist and fluffy, with a hint of chocolate from the cocoa powder.
If you love fresh baked homemade cakes, then we think you will enjoy our sour cream pound cake and lemon poppy seed cake.

Quick Look at the Recipe
- ⏲️ Prep Time: 50 minutes
- ⏲️ Cook Time: 15 minutes
- ⏲️ Total Time: 1 hour 5 minutes
- 🍽️ Yield: 20 slices
- 🥕 Dietary Info: Vegetarian (can be made Gluten Free and Dairy Free)
- ⚡ Calories: 480 calories per serving (based on nutrition facts in recipe card)
- 🧈 Ingredients: cake flour, baking soda, salt, cocoa powder, unsalted butter, sugar, olive oil, eggs, vanilla extract, white vinegar, red food coloring, buttermilk, and boiled milk frosting.
- 🥣 Method: Oven Baked
- ⌛ Time-Saving Hack: Use a kitchen scale to quickly and easily measure the ingredients accurately.
- 🔪 Equipment: stand mixer, spatula, cake strips, and cake pans.
- ⭐ Expert Tip: Use cake flour instead of all-purpose for an extra tender and fluffy result.
- 🍰 Flavor & Texture: This red velvet cake has a light and fluffy texture with a creamy frosting. It's always moist and delicious!
Summarize or save this content on
Why This Recipe Works
- It's made with cake flour. This type of flour has less protein in it than all-purpose, yielding a lighter and more tender cake.
- The ingredients are weighed for accurate measurements. This is a vitally important step, as inaccurate measurements can add too much flour, which dries out the cake.
- The cake turns out light and fluffy. The acid in the white vinegar and buttermilk react with the baking soda to cause the cake to rise, which creates a beautiful texture.
- It's not dry or overbaked. Use an oven thermometer to make sure your oven is at the right temperature, and switch the pans around halfway through the bake. Take the cakes out as soon as toothpick inserted into the center comes out clean.
- It's decorated with the traditional icing. Red velvet was traditionally decorated with boiled milk frosting instead of cream cheese frosting, and it definitely tastes better!
Featured Comment
⭐⭐⭐⭐⭐ "This is the red velvet cake of my childhood. My aunt and uncle visited NYC in the 1950's. The Waldorf Astoria hotel restaurant had a special. If you bought a piece of their Red Velvet cake for a whole dollar, they would give you the recipe! It was one of my aunt's most treasured recipes!"
- Angi
Jump to:
Ingredients

Curious what the key ingredients are in a moist red velvet cake? Let's talk about the most important ingredients you'll need for this recipe.
- Cake Flour: This type of flour contains less protein than all-purpose, yielding a softer and fluffier result.
- Cocoa Powder: It adds a hint of chocolate flavor, plus it helps with the color.
- Distilled White Vinegar: It sounds weird to use vinegar, but it's actually an important ingredient in red velvet. Vinegar brightens the color and helps it rise.
- Liquid Red Food Coloring: Although it technically doesn't need food coloring, we like to add it for a brighter, richer color. It takes about 2 tablespoons to get the deep color we all love in a red velvet!
- Buttermilk: This thick, tangy liquid helps it rise and makes it moist and tender. I recommend using the real, full-fat buttermilk in this recipe instead of substituting it with sour milk (1 tablespoon of vinegar or lemon juice mixed with 1 cup of milk).
See recipe card for full information on ingredients and quantities.
How to Make Red Velvet Cake
Measure out all the ingredients, making sure they're all at room temperature. It's best to weigh the flour on a kitchen scale for the most accurate measurement. Alternatively, you can spoon the flour into the measuring cup and level it with a knife.

- Butter three 9-inch springform pans and line their bases with parchment paper. This ensures nothing sticks to the pan! For perfectly flat layers, I recommend wrapping a cake strip (affiliate) around the outside of each pan. You can even make your own with just aluminum foil and paper towels! (image 1)
- Whisk the dry ingredients, then sift once to remove lumps and give the dessert a lighter texture. (image 2)

- Cream the butter and sugar until they're a very pale yellow and quite fluffy. It will be pretty grainy, because there's a lot more sugar than butter here! (image 3)
- Scrape down the sides of the bowl with a flexible spatula and beat in the oil for about 2 minutes. It will be pretty liquidy; don't worry. (image 4)

- Add the eggs and vanilla. (image 5)
- Scrape down the bowl and beater, then add the vinegar and food coloring or a natural food dye. I'm loving that color! (image 6)

- Now comes the gentle part: folding. Fold in half of the dry ingredients by scraping the edge of the bowl in one stroke, then cutting through the middle. Fold in the buttermilk until blended, then fold in the remaining dry ingredients. No lumps or streaks of flour should be in sight! (image 7)
- Divide the batter among the prepared pans, then tap the pans on the counter a few times to remove large air bubbles. Bake at 350°F for about 15 minutes, or until a toothpick inserted in the center comes out clean.
Switch the pans around halfway through, and be careful not to overbake! Let them cool for 10 minutes in the pan, then remove them from the pan and let cool completely on a wire rack. (image 8)

- Ice your red velvet with boiled milk frosting (the original icing) or cream cheese icing. (image 9)
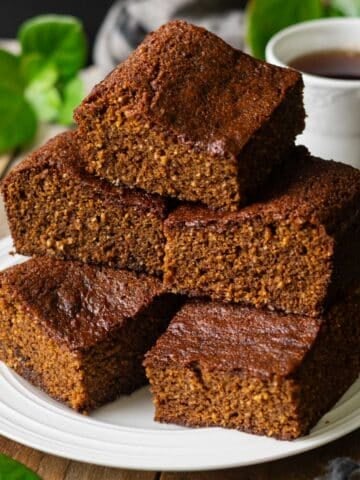
- Slice, serve, and enjoy this moist red velvet cake! (image 10)
Recipe FAQs
No, they are different! Red velvet is made with vinegar and buttermilk, which react with baking soda to make it rise. The red color comes from the reaction between the cocoa powder and the acidic vinegar and buttermilk.
For a brighter shade of red in your red velvet, you can add red food coloring. Unlike red velvet, most chocolate cakes are made with baking powder and don't contain food coloring. Read more about the differences between chocolate and red velvet cakes here.
Red velvet is a cross between the flavor of a regular white and chocolate cake. It doesn't have a strong chocolate flavor despite containing cocoa powder. The texture is moist and delicate. Red velvet is usually covered with a white or cream cheese icing creating a winning combination.
Red velvet's origins are from Victorian times when bakers added cocoa powder, cornstarch, or almond flour to make their cakes soft. The chemical reaction between the cocoa powder and the baking soda/buttermilk does naturally color it a light red.
In the late 1930s or early 1940s, John Adams (owner of Texas-based Adams Extracts) decided to add red food coloring to boost sales of his dyes. The cake grew in popularity, and by 1950 it was a popular dessert at the Waldorf Astoria hotel in New York City.
You can swap out the liquid red food coloring for another bright, yet dark color. Blue, green, and other dark colors will work better than lighter colors such as yellow.
Leftovers: Store the red velvet cake in an airtight container at room temperature for up to 3 days. If you're decorating it with cream cheese frosting, store in the refrigerator.
Freezing: Bake cake red velvet layers can be wrapped in plastic wrap and foil and frozen for up to 1 month. Pre-slice a baked and decorated cake and seal in an airtight container or bag and freeze for up to 1 month.
Serving Red Velvet Cake
Looking for other cakes? You'll definitely want to try our recipes for sour cream chocolate cake, Boston cream pie, gingerbread bundt cake, maple walnut bundt cake, and sour cream pound cake.

Expert Tips
- Make sure all the ingredients for red velvet are at room temperature before you begin. Take the buttermilk out of the fridge 45 minutes to 1 hour before you start. Warm up the eggs by submerging them in warm water for 10 minutes, and soften the butter by microwaving it in short intervals.
- Use cake flour instead of all-purpose. The lower protein content in this flour will result in a more tender and fluffy dessert.
- Be sure to measure the flour accurately, as too much flour will result in a dry cake. If you're using measuring cups, spoon the flour into the cup and level the top with a knife. Preferably, use a kitchen scale to get a more accurate measurement.
- Fold the batter gently, making sure all the flour is incorporated (no white streaks or lumps). On the other hand, be careful not to overmix.
- Be careful not to overbake, or it will be dry. Mine was perfectly done at 15 minutes, but your oven will probably bake a little differently. Always test a couple minutes before the timer beeps if you're unsure.
More Cakes You'll Love


Recipe

Best Red Velvet Cake
Ingredients
- 2½ cups cake flour, spooned into measuring cup and leveled
- 1 teaspoon baking soda
- 1 teaspoon salt
- 3 tablespoons unsweetened cocoa powder
- ½ cup unsalted butter, softened
- 1½ cups caster sugar
- 1 cup light-tasting olive oil
- 2 large eggs, at room temperature
- 2 teaspoons vanilla extract
- 1 tablespoon white vinegar
- 2 tablespoons liquid red food coloring
- 1 cup buttermilk, at room temperature
- 3 cups boiled milk frosting or cream cheese frosting
Equipment
Instructions
Making the Cake
- Preheat the oven to 350°F. Lightly butter three 9-inch springform pans and line their bases with parchment paper. Wrap cake strips around the pans for flat topped cakes if desired.
- Whisk together the flour, baking soda, salt, and cocoa powder, then sift to remove any lumps.
- Beat the butter and sugar in the bowl of a stand mixer fitted with the paddle attachment until very light yellow and fluffy, about 5-8 minutes on medium-high speed. Scrape down the sides of the bowl with a flexible spatula, then add the olive oil and mix for 2 minutes on medium speed.
- Blend in the eggs and vanilla, then scrape the sides of the bowl and the beater. Mix in the vinegar and food coloring or natural food dye until well combined.
- Add half of the dry ingredients and gently fold them in with the spatula. The best way to fold is to scrape around the edges of the bowl in one stroke, then cut through the center of the batter. Repeat until mixed. Fold in all the buttermilk, then fold in the remaining dry ingredients. Be careful not to overmix, but be sure there are no white lumps or streaks in the batter.
- Gently divide the batter among the prepared pans. Tap each pan on the counter a few times to get rid of any large air bubbles in the batter.
- Bake at 350°F for 15 minutes, switching the pans around after 10 minutes to ensure an even bake. It's done when its surface just barely springs back when gently touched, and when a toothpick inserted into the center comes out clean.
- Let them cool for 10 minutes in the pans, then remove from the pans and let cool completely on wire racks, about 45 minutes to 1 hour.
Decorating
- Slowly and carefully peel the parchment paper off of the cakes.
- Set one cake on a large, flat plate and spread a layer of icing on top. Repeat with the following two layers.
- Crumb coat the sides by spreading a layer of icing on, then scraping most of it off. Carefully spread more icing over the crumb coat, smoothing with an angled spatula.
- Serve the cake in slices, and store leftovers in an airtight container for up to 3 days at room temperature.
Notes
- Use cake flour instead of all-purpose for an extra tender and fluffy result.
- Measure the flour accurately, preferably with a kitchen scale, to prevent a dry cake.
- Use room temperature ingredients.
- Be careful not to overbake, or it will be dry. Mine was perfectly done at 15 minutes, but your oven will probably bake a little differently. Always test a couple minutes before the timer beeps if you're unsure.
Nutrition
Serving sizes and nutritional information are only an estimate and may vary from your results.
Debbie Hallmark
if I want a REALLY moist red velvet.....add an 9 ounce can of pineapple
Emma Fajcz
That sounds delicious, Debbie! Pineapple makes carrot cake really moist, too!
Angi
This is the red velvet cake of my childhood. My aunt and uncle visited NYC in the 1950’s. The Waldorf Astoria hotel restaurant had a special. If you bought a piece of their Red Velvet cake for a whole dollar, they would give you the recipe! It was one of my aunt’s most treasured recipes!
Emma Fajcz
What a sweet story, Angi! I'm glad you enjoyed this recipe and that it reminds you of this special memory.
Beth
This cake has a brilliant red color. I like the cake's underlying cocoa flavor.
Emma
Thank you, Beth!